
Ikonets teknologi
THE PROCESS OF CREATING AN ICON
© Jacek Wróbel SJ
An icon written on a wooden support is one of the forms of sacred art depicting the reality of the Kingdom of God taking place on Earth. In addition to wall paintings, frescoes and bas-reliefs, the image on the board, since the early centuries of Christianity, served believers first to commemorate the events that led to the salvation of man from eternal death, and then as an element of worship, i.e. worship of God, igniting love and stimulating to pray. Both these sumptuous icons placed in temples as well as the smaller ones kept in homes and those taken on journeys.
The symbolism of the image as well as the process of its creation have their own meaning for expressing the essence of the One whom it represents or points to. Therefore, it must be remembered that in addition to the craftsmanship or artistic dimension, the creation of an icon has its spiritual reference, which is based on the technologically appropriate use of the technique. Its basis is, in turn, maintaining traditional methods and well-chosen materials. So let's start with them.
SUPPORT
The basic elements of the icon writing workshop include: support, primer (levkas), gilding, tempera paints and a suitable varnish. Appropriate workshop accessories are also necessary, without which it is difficult to talk about the preservation of the old and spiritually deeply expressed painterly technique of icons.
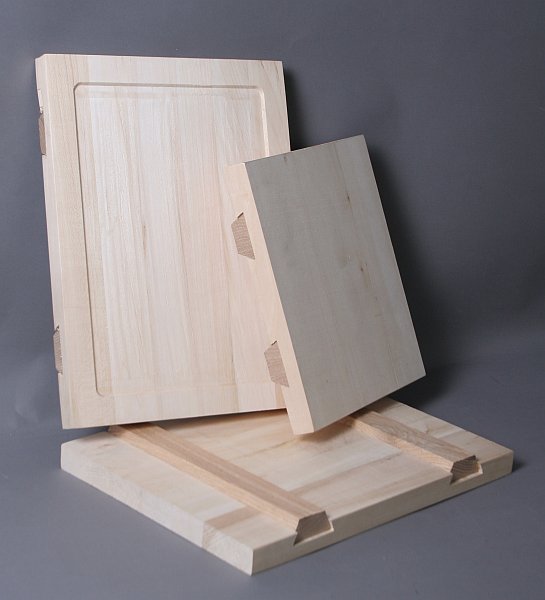
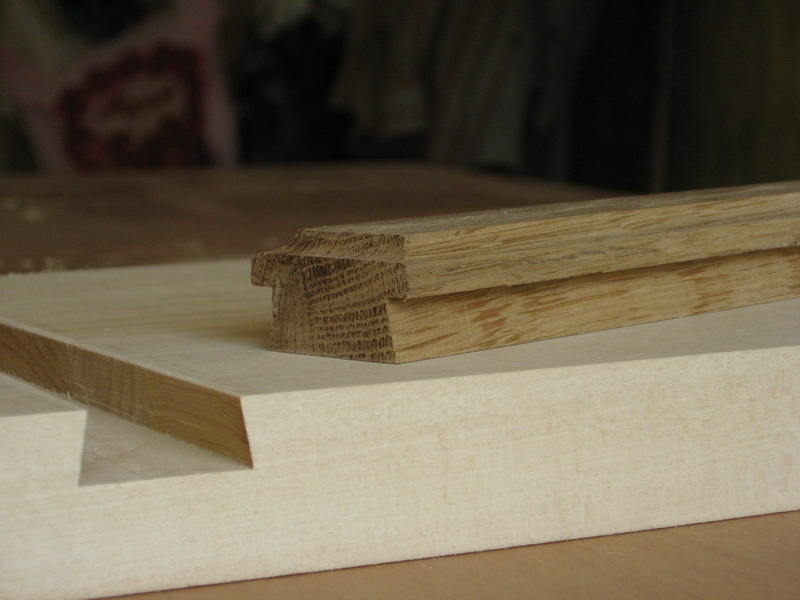
As a support we use glued boards – preferably from deciduous trees, such as linden, poplar, pear, etc. But it can also be a coniferous wood support – in this case, you need to pay attention to their resinousness and knots, which in the process of deformation (bending) of the boards can cause a lot of trouble. The support should be glued of several boards, not wider than 10 cm each. Standard thickness – for dimensions from a dozen or so to several dozen cm in height – is about 2.5 cm. To reinforce the whole, the transverse slats made of hard wood, called braces, slipped by means of a cutter are used on the reverse side.
 |  |
PRIMING
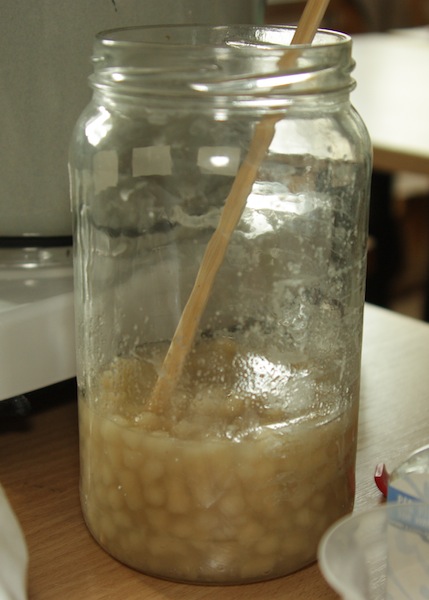
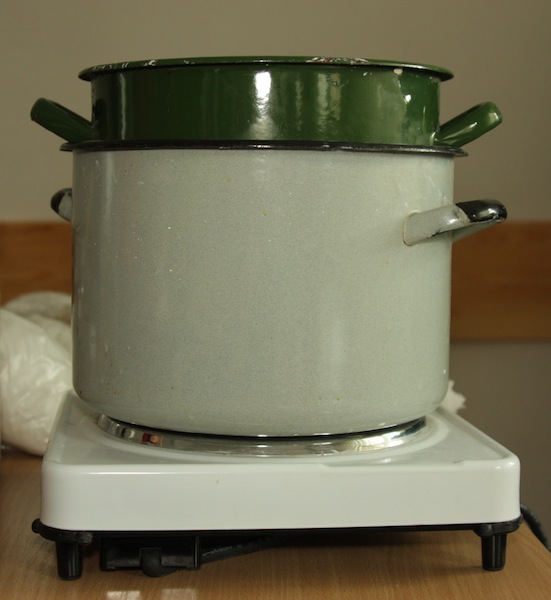
To prepare the primer for the support, we need Champagne and Bologna chalk, rabbit-skin glue, thin linen and a few kitchen accessories. Before starting the priming, we first need to impregnate the board in order to create a layer that connects the wood and the glue-chalk primer. The first step is to soak the glue, which can be bought in the form of dry granules or grits, then dissolve it, heating it to 60 ºC. For this we use demineralized water and soak the glue in the (capacitive) proportions of 1:8 (glue to water). The soaked glue should be left for about 4 hours so that it swells, mixing it in the initial stage of soaking so that a "dumpling" is not formed at the bottom of the vessel. Then we heat it up in a "water bath", stirring from time to time until the last pearl dissolves. We use glue on the surface of the board to be primed. Wait until it is completely dry.
 |  |
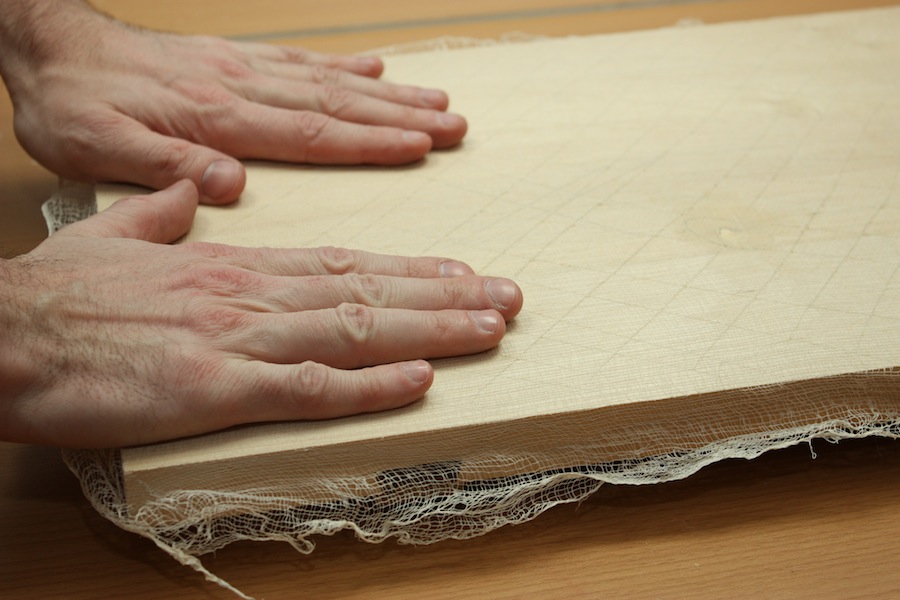
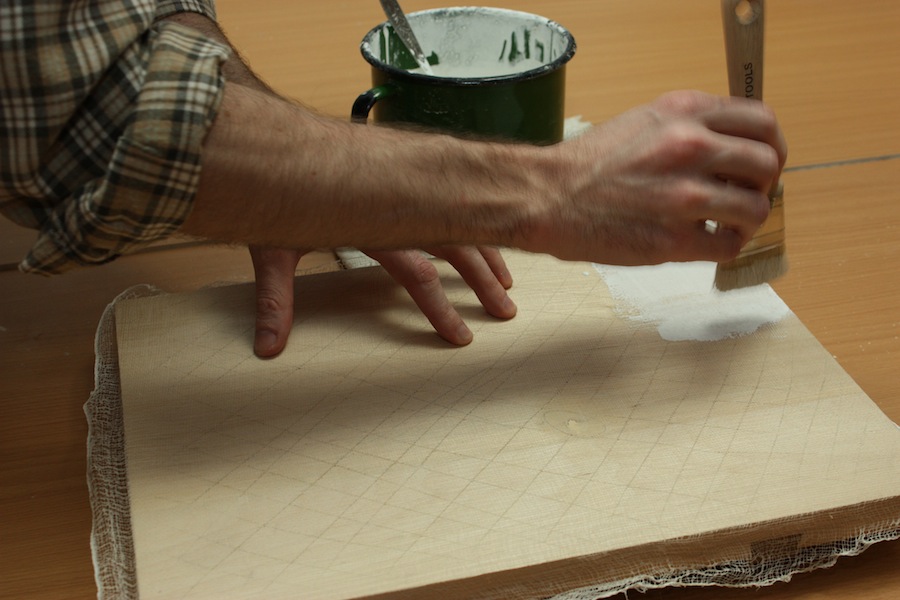
The next phase is gluing the canvas to the board in order to make the support flexible and to protect the paint layer against cracking. You can use a cotton sheet or gauze for this. The canvas is glued with an adhesive solution in the proportion of 1:4, prepared according to the above-mentioned method. Sticking can be done by taping with a flatly cut and glue-soaked brush, or by dipping the canvas in glue and carefully stretching it over the board. Again, wait for it to dry thoroughly (about 4-6 hours at room temperature).
 |
During this time, we can prepare a glue-chalk primer. This requires an adhesive solution in the proportion of 1:8, heated to 60 ºC. Slowly sprinkle the heated glue with a mixture of Champagne chalk and Bolognese chalk (in the proportion of about 2:1) until the liquid is saturated. To increase the flexibility of the primer, you can add 1 table spoon of linseed oil per 2 litres of the primer. Leave the mixture for several hours (preferably overnight) for the glue to penetrate the chalk and create a uniform suspension. Then we heat the suspension up in a "water bath" and strain the liquid warm primer to separate small lumps and dirt from it. You can use a double-folded gauze spread over a pot for this. The primer prepared in this way is carefully tapped into the canvas stuck to the board, but taking care not to get it wet. After the first layer of the primer has dried well (about 2-3 hours), repeat the activity twice, each time heating the solution of chalk and glue. Subsequent thin layers of the primer can be applied by brushing, ensuring each time that the primer is placed on a dry surface. There should be around 8-12 layers in total, in order to obtain a layer thickness of 1-2 mm. To facilitate the treatment of the primer, which will ultimately create a smooth and even surface, the last 2 layers can be applied with a spatula. The primer applied and dried in that way is sanded with sandpaper (grammage from 200 to 600).
 |
SKETCH
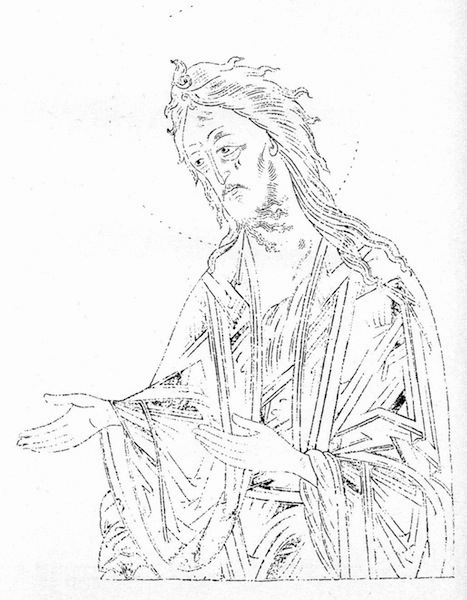
In order to create a specific icon, we use templates (sub-liners) developed by the Tradition, which define the iconographic theme and the manner of its presentation, i.e. the style. However, it is not about sticking to the details in a specific artistic solution, but about preserving the essence. Each of the holy figures and genre scenes are related to their characteristic elements of the representation - these should be respected in order for the painting to retain its universal, and therefore, iconic character. For this, it is important to familiarize oneself with what the Tradition shows before drawing up a sketch. However, not by copying (although it is one of the best workshop schools when it is accompanied by reflection and understanding), but by extracting and including the essence and theological content of a given representation. In this way, it will be possible to avoid glaring mistakes (which the long history of iconography is not devoid of) and, consequently, not to make an object of faith out of "folklore".
 |
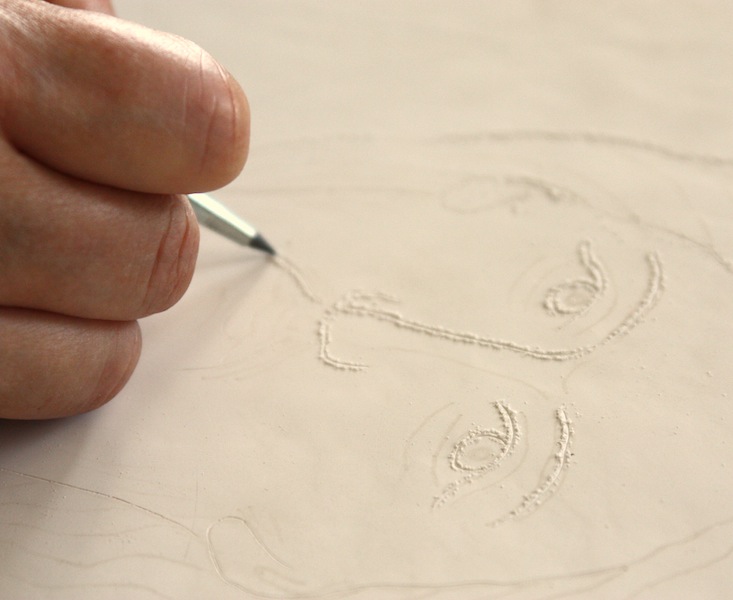
A sketch prepared on paper, appropriate to the size of the support at our disposal, is transferred to the board. The easiest way to do this is to transfer it by calking. To do this, cover the reverse of a sheet with a dark pigment, then precisely apply the sketch to the support and outline the whole with a contour line. The image transferred in this way is preserved by delicately engraving it on the primer. You can use a pointed stylus or even a compass needle for this purpose.
 |  |
GILT
The icon is associated with gilding. That is why they are an important aesthetic element of the icon - but not only. The gold of the nimbuses of holy figures or the entire background indicates the heavenly light, personifying the presence and holiness of God Himself. Hence, every figure of a saint depicted in an icon, surrounded by a golden nimbus, tells us about God who penetrated his or her life and filled it with His glory. As an equivalent of gold in panel painting of icons, there were and are still used also silver and yellow ochre.
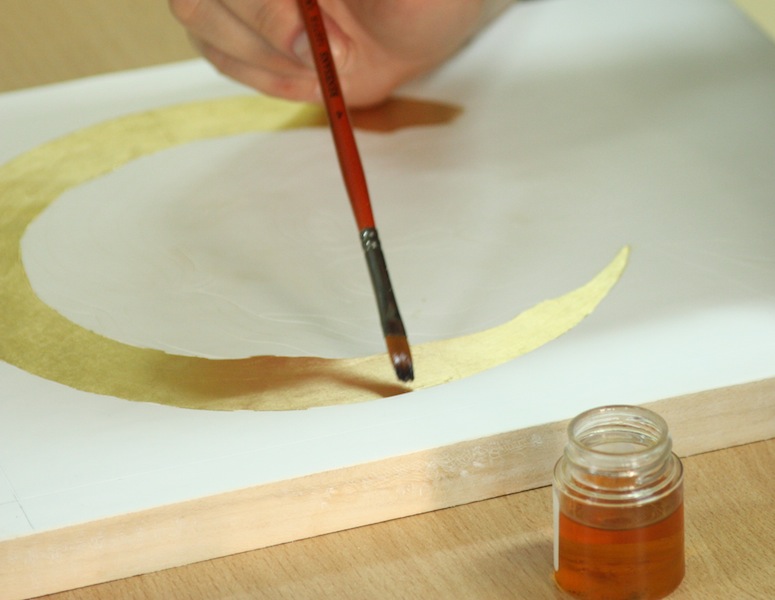
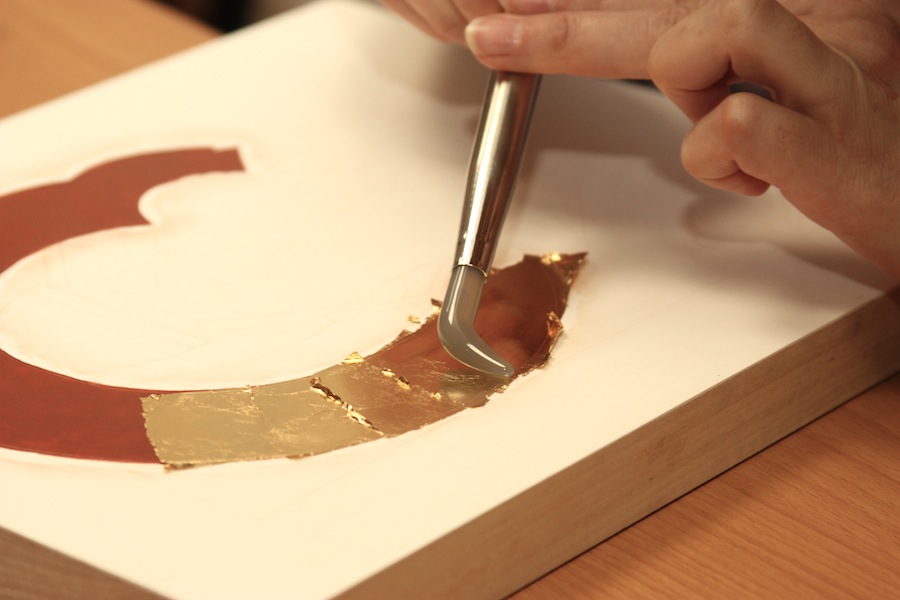
Among the various gilding techniques, the most available is mixtion gilding. You can use an acrylic mixtion or a fatty 6- or 12-hour mixtion. In the case of an acrylic mixtion, apply it with a soft synthetic brush, thinly covering the surface intended for gilding. Already after 15 minutes it can be covered with schlagmetal or transfer gold leaves. In the case of using a fatty mixtion, before applying it, the surface intended for gilding should be covered with 2 or 3 layers of a 6% solution of shellac (dissolved in spirit). Shellac creates an insulating layer that prevents the mixtion from soaking into the primer. The mixtion is applied to the dried shellac with a soft synthetic brush so that it forms a thin, even surface. Until it dries (3 or 12 hours, depending on the mixtion used), the covered surface should be protected against dust so that there are no minimal but clearly visible dust particles under the gold. By means of greasy mixtions you can successfully stick transfer gold or schlagmetal leaves. In the case of the latter, the metal should be covered with a thin layer of shellac to isolate it from moisture that causes blackening.
 |  |
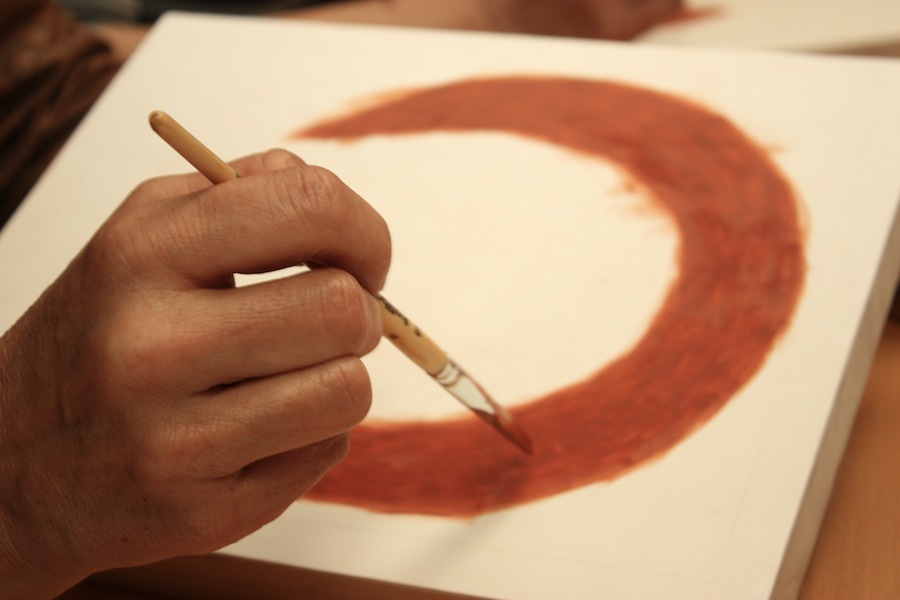
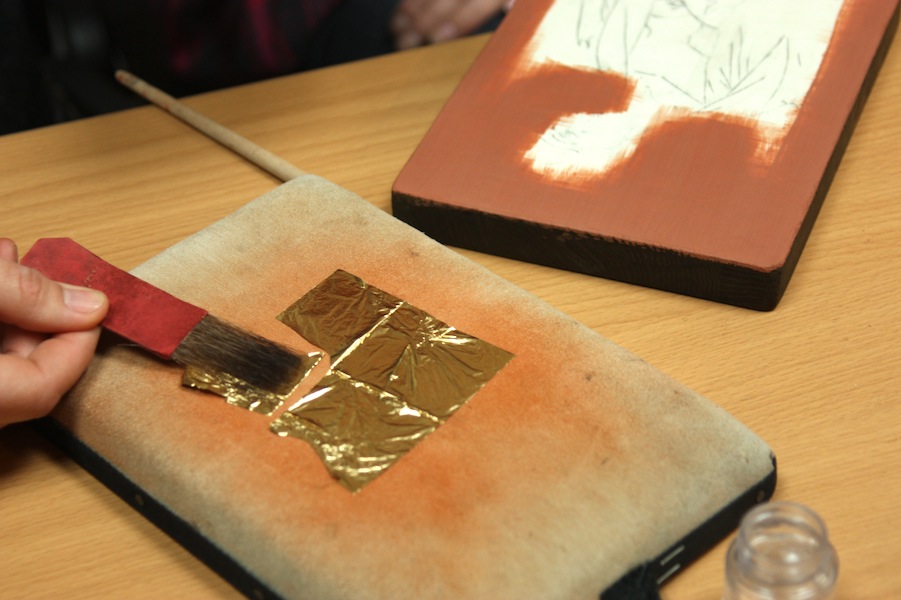
Another, much more noble technique of gilding is bole gilding. Bole clay is mixed in appropriate proportions with the rabbit-skin glue solution and the warm and thin bole obtained in this way is applied in thin layers until the surface to be gilded is completely covered. This surface should then be "blended", i.e. polished with a short-cut stiff brushs – a tortillon or a felt ball.
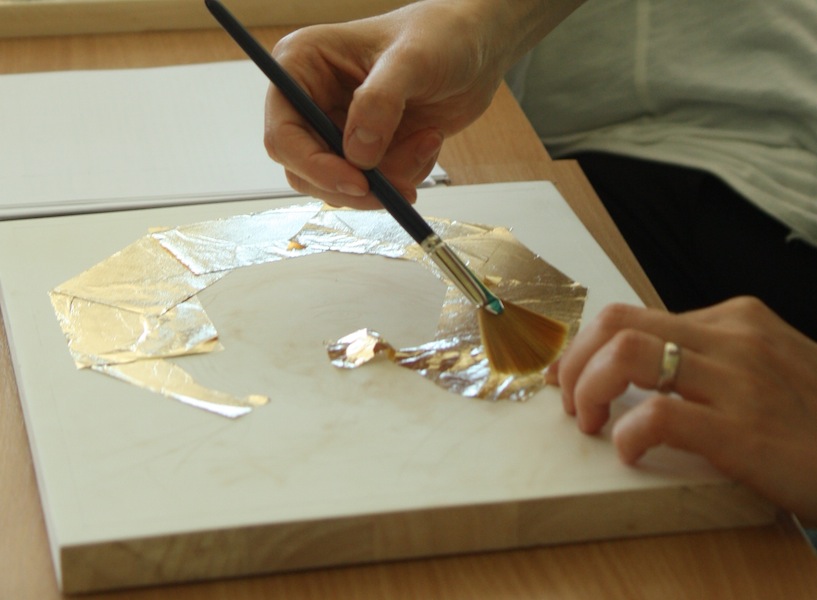
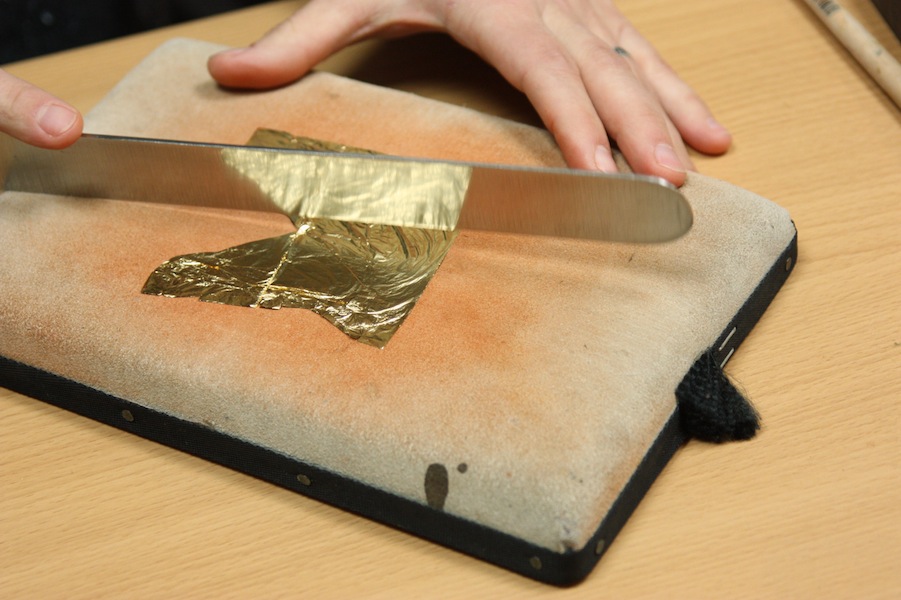
Now the actual gilding takes place. A leaf of gold (or other precious metal) is transferred from the book to a gilding pad and divided into smaller pieces with a gilding knife. The leaves prepared in this way are transferred with a transfer brush to the bole surface, moistened with a 40% alcohol solution. After sticking and "sucking" the leaf by the bole, press it with a cotton or chamois swab. To obtain a surface with a greater intensity of light reflection, gold should be polished with gilding agate.
 |  |
 |  |
MEDIUM AND PREPARING OF THE TEMPERA
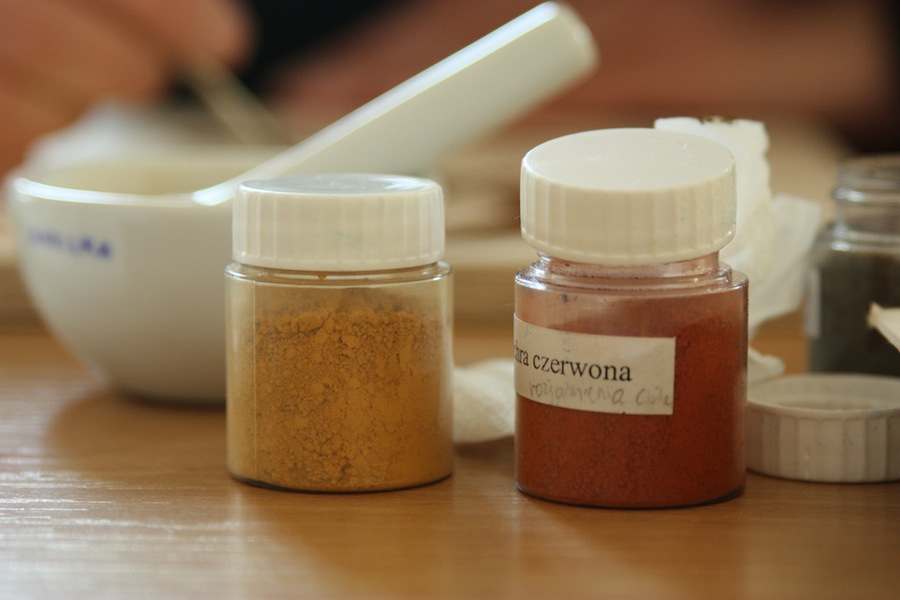
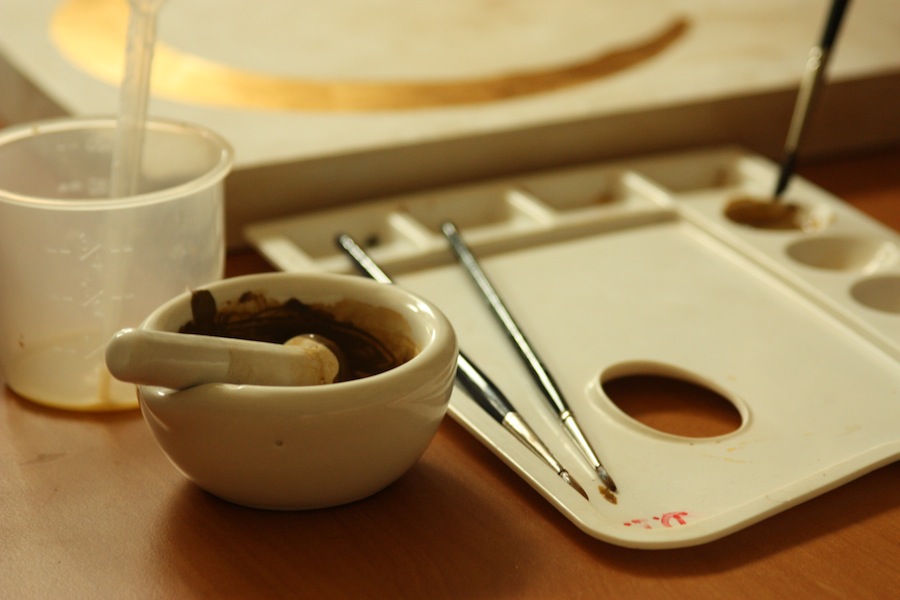
The traditional painting technique of the icon is thin tempera. It is based on pigments and a suitable medium, i.e. a binder. We prepare the medium (paint binder) from chicken yolk, separated from the film that binds it, diluted in a "solvent" in the proportion of 1:3. As a solvent, we can use demineralized water, and even better – dry white wine. When using water, it is good to "poison" the medium with 3 drops of clove oil, which will reduce the activity of bacteria and possible mold. The content of the yolk must be thoroughly mixed with the solvent. The medium prepared in this way is combined with a given pigment to obtain a paint with the consistency of milk. In most pigments, especially of mineral origin, it is not enough to mix it with the medium on the palette, but it becomes necessary to mash it. It is best to use an apothecary mortar for this – pour the appropriate (usually small) amount of pigment and a few drops of the medium into the mortar (so that the consistency forms a thin paste) and mash it for a few minutes. We dilute the paint mashed in this way with the medium.
 |  |
For mixing the paint, plastic or ceramic palettes are best, which in addition to a flat surface are equipped with small cavities - perfect for preparing the right amount of thin tempera. As for brushes, I recommend soft brushes for water paints, made of squirrel, red sable or marten hair. The property of these brushes is not only the combination of softness and elasticity, but also the descent of the ends of the bristles into a sharp point, necessary for making details.
 |
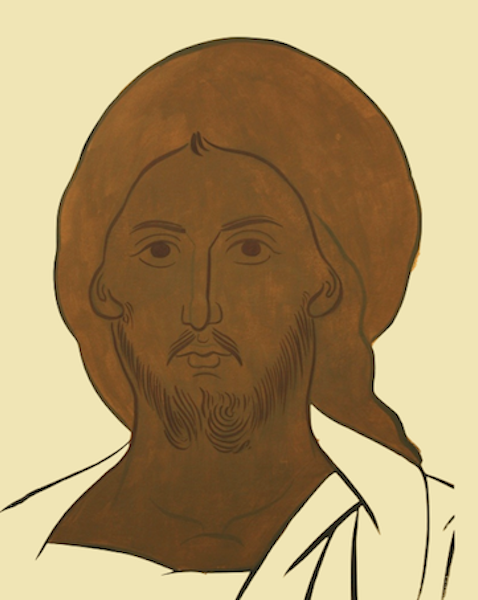
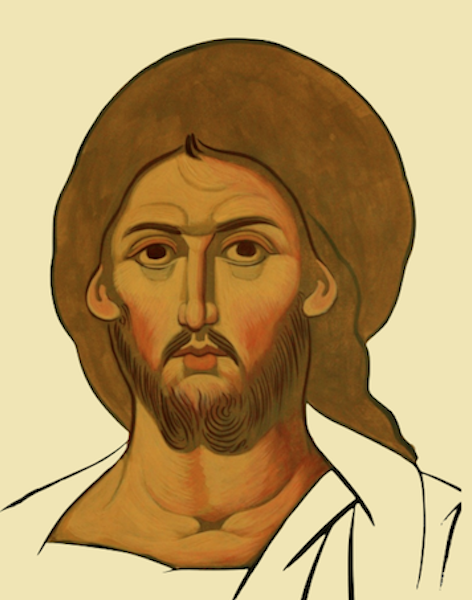
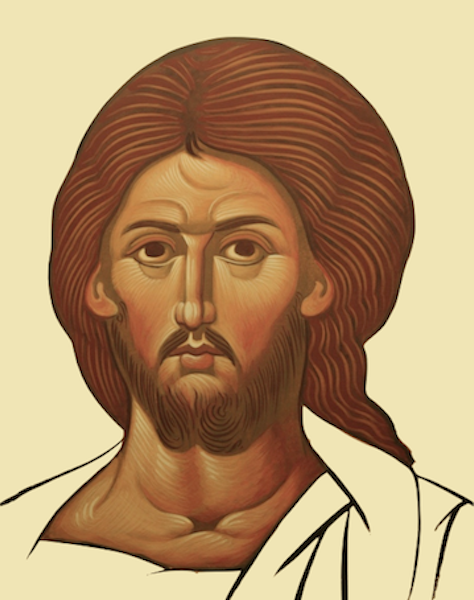
PAINT LAYER
Now the actual icon writing process begins. It consists, in the most general terms, in bringing light out of base paints, known as "sankirs". Each of the elements of the icon, such as faces and other exposed parts of the body, clothes, architectural elements, etc., are covered with a uniform colour. For this purpose, we can use two different techniques: either by applying several thin layers of paint until the desired uniform surface is obtained, or by "pouring" a watery stain onto a plane defined by a sketch. In the latter case, wait until the paint is completely dry before proceeding with further work. We apply delicate lines of the drawing (first outline) marked with engraving onto this underpainting. The next steps are to apply bright (ever brighter) glaze layers to bring out the figures and other elements of the icon. In the final stage of painting, the whole is re-contoured, with the so-called second stroke.
 |  |
 | 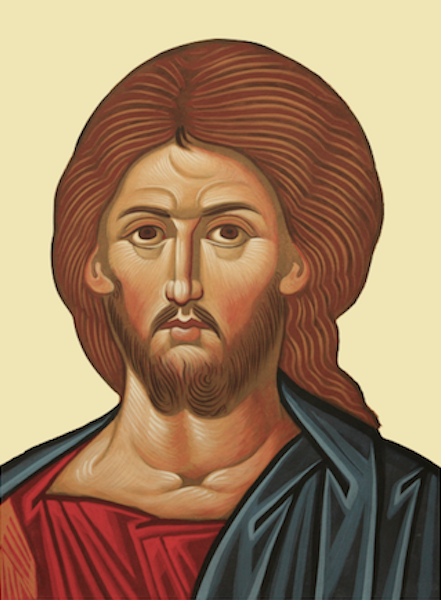 |
FINISHING
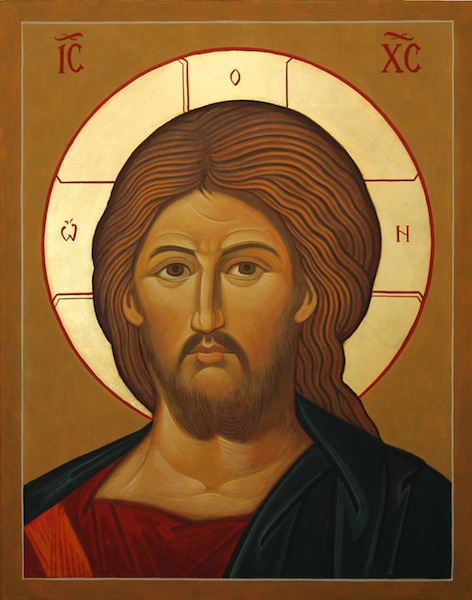
What gives the image an iconic character is the signature. A character or scene is determined not only by the characteristic way it is presented, but also by the name of who it points to. Signatures are placed next to the heads of saints, traditionally in one of two languages - Greek or Old Church Slavonic language. Today, you can also find icons signed in Latin - especially of saints of the Western Church - or in national languages. However, for the persons of Christ and the Mother of God, abbreviated captions in Greek containing the first and last letters of the name have become established and popularized.
 |  |
VARNISHING
The last technological step of icon writing is to protect the paint layer and the gilding. Tempera, as a type of water paint, is exposed to easy mechanical damage. For this purpose, and to complete the consistency of the paint, it should be covered with an appropriate varnish. However, not earlier than a few weeks after the end of the painting process. The tempera medium made from chicken yolk contains fats that take longer to dry than just evaporating the water. The optimal period is three months. After this period, the icon should be covered with an appropriate varnish for tempera or gouache paints. Also, the traditionally used "olipha" varnish is now produced synthetically and can be purchased in shops for art restorers.